Hi everyone,
Today I'm going to show a little Do It Yourself project I did on my new Nook Color cover/case to let me keep it closed. You can replicate it on a Kindle case, or even an iPad case, depending on the design.
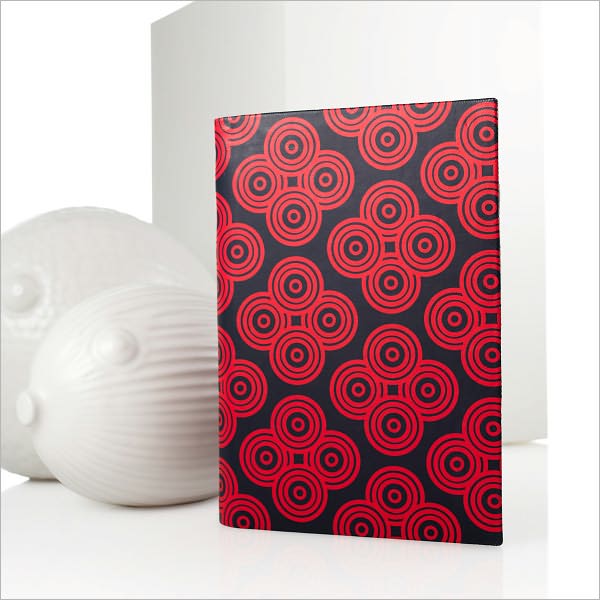
It's a lovely leather case by Jonathan Adler for Barnes & Noble, but it had one problem: it had no closure. Now this probably isn't a big deal, except for the fact that I kept having visions of freak in-purse accidents happening--a pen slips in between the cover and the screen, I drop my bag, and crack! Or, the gum works its way free of the Orbit paper container and the New York heat melts it onto my screen...disaster. Plus the case was overpriced in the first place (as all these fancy cases are) and I just couldn't believe it didn't come with a buckle or something! So, not about to return the totally cute case, I thought up an incredibly cheap and simple solution that doesn't damage the leather at all.
This is the case originally, first the outside and second the inside:


Step #6: Pull through all the way until the metal anchor is flush with the flap! Pat yourself on the back, you're done!

This is what it will look like on the outside, closed two different ways:


Today I'm going to show a little Do It Yourself project I did on my new Nook Color cover/case to let me keep it closed. You can replicate it on a Kindle case, or even an iPad case, depending on the design.
It's a lovely leather case by Jonathan Adler for Barnes & Noble, but it had one problem: it had no closure. Now this probably isn't a big deal, except for the fact that I kept having visions of freak in-purse accidents happening--a pen slips in between the cover and the screen, I drop my bag, and crack! Or, the gum works its way free of the Orbit paper container and the New York heat melts it onto my screen...disaster. Plus the case was overpriced in the first place (as all these fancy cases are) and I just couldn't believe it didn't come with a buckle or something! So, not about to return the totally cute case, I thought up an incredibly cheap and simple solution that doesn't damage the leather at all.
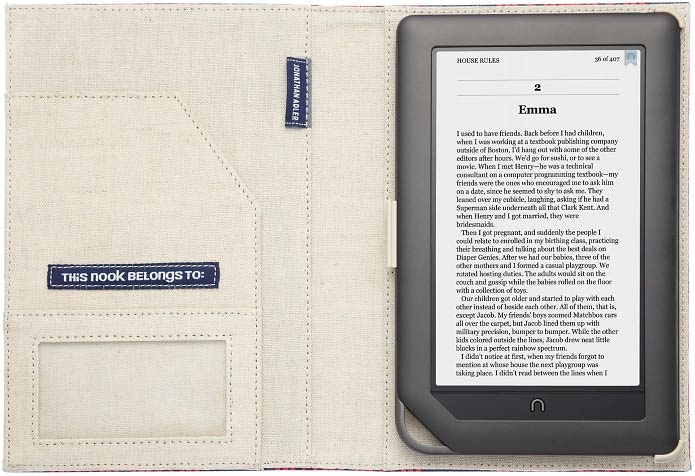
This is the case originally, first the outside and second the inside:
Pictures courtesy of Barnes and Noble website. No clue what those white porcelain things with the eyes are in the background. Fish?
Emma is one of the worst literary heroines of all time. She's completely unlikable. Eugh!
The tools I used were a hodgepodge borrowed from my mom's sewing desk. Thanks, Mom!

Don't worry, guys, I know not everyone has a curved needle or a seam ripper (far right), but most people have some combination of an X-acto knife/paring knife + small scissors/screw driver + needle.
The last thing I took was a stretchy closure from one of my dad's file folders that was laying around. It probably costs 50 cents at CVS. This black elastic thing here:
Step #1: Draw a dot in pen about midway down the inner cover, as close to the seam as possible so as to let the cover close fully once the metal anchor of the elastic band is in place.
Step #2: Poke X-acto knife or paring knife through hole; twist to enlarge the hole. Then, if you have a needle that gets wider from point to end, poke that through to try to get the hole bigger. The idea is to be able to fit a loop of the elastic into the smallest hole possible to keep it as secure as possible.
Step #3: Twist the scissors (keeping the blades closed as in photo) or small screwdriver through hole, wiggling back and forth to enlarge a bit further. Do size checks by trying to fit the loop in periodically (from beneath the flap--you want the metal anchor to be hidden). When it seems plausible, then you go to Step #4.
Step #4: Hello, welcome to Step #4. Here, we poke the elastic with a needle--NOTE we do not THREAD the needle, we poke the elastic through with a needle (I used the curved one), like this:

Step #5: Work the needle through the hole, and once the elastic begins to show through on the outside, pull it through while pushing the needle.

Step #6: Pull through all the way until the metal anchor is flush with the flap! Pat yourself on the back, you're done!

This is what it will look like on the outside, closed two different ways:

Oooooooh!

Aaaahhhh!
And there you have it! A great, super cheap fix up for an otherwise great Nook case. I was really happy with this project!
Bonus/DIY #2: I also came up with an idea for that empty "This Nook belongs to:" spot. I'll be taking a rectangular piece of paper, folding it in half width-wise. On the outer flap, decorate it with something cool, maybe some abstract scrolling intaglio I used to doodle compulsively in high school, or a mini collage of flowers from a magazine. On the inside, my actual contact information. This way, no subway creeper can lean over and memorize/copy down my information without me knowing, and I get to personalize my Nook even more! I'll post up a picture when I actually do it. For now--I'm lazy, bahah.
Happy Reading!
